Creality has long been recognized as a pioneer in the 3D printing industry, with the Ender 3 being one of the most popular options out there. After the recent release the Ender 3 Neo and S1 printer lines. Creality has returned with the Ender 5 S1 printer. This is an improved version of the Ender 5 printer with a few notable upgrades.
Creality has been making some of the best 3D printers out there at reasonable prices for a long time now, and the Ender 5 S1 continues that tradition of offering exceptional quality at the right price.
Let’s take a look at the Ender 5 S1 and see if the 250 mm/s print speed is achievable and produces clean results.
Creality Ender 5 S1: Design & setup
Like the previous Ender 5 models, the Ender 5-S1 has a classic cube design. The bed moves up and down, and the hotend is mounted on the top of the cube frame. The first thing you’ll notice about the Ender 5 S1 is that the extruder has been replaced with a new direct drive setup using Creality’s “Sprite” extruder, with a hot end that can reach temperatures of 300 degrees Celsius.
The classic text screen and dial control are also gone, replaced by a full-color 4.3-inch touch screen with easy-to-see and navigate menus with all the options you need to get everything set up and running. It has been relocated from the right side of the unit to the center of the casing, where the mainboard and other electronics are housed.
What’s in the box
Printer base with touch screen
Top frame with direct drive hot end
Printing platform
Z-axis assembly
Four Profile rails
Left and Right Platform Support Assembly’s
Two Diagonal Braces
Spool Holder
Side cutters
Wrench, Screwdriver and hex wrenches
Nozzle Cleaner
Metal Scraper
USB reader and MicroSD
Power cable
Cable ties
Five Flat Cable Clips
Blue Bowden Clip
Bending harness
200g Spool of Filament
Spare 0.4mm Nozzle
Bowden Tube
Various Screws for assembly
The first step in the assembly process is to secure the four profiles to the printer’s base with eight M5x25 screws, ensuring that the profiles are square and straight. After that, install the top assembly using eight of the same M5x25 screws, making sure everything is square and tight. The following step is to prepare the print bed assembly for installation on the printer frame. We used the foam from the box to support the print platform as we attached the bed to the Z-axis assembly. We install the printing platform support arms on the bottom of the bed after we secure it to the Z-Axis assembly.
When you’re ready to install the printing platform and Z-axis assembly, you might need a helping hand to tilt the printer frame forward to make room for the Z-axis assembly. As with the other parts of the assembly, use the supplied M5x30 screws to secure the Z-axis to the frame and ensure that everything is tight. Install the two braces on the bottom rear of the printer frame, noting the R and L on the braces to determine which side they are installed on.
All that remains is to install the spool holder on the right side, the Bowden extruder on the filament run out sensor and the direct drive, and finally to connect all the cables to the appropriate plugs. Each plug is labeled, making the final step simple. Finally, double-check the voltage on the power supply to ensure it is set to the correct voltage for the country you live in.
Once the printer has been assembled, all that remains is to plug it in, turn it on, and begin by accessing the settings menu and levelling method. On the Aux.LVL screen, first click on the home icon on the right side. Once the bed is in the top position, adjust the offset by clicking the up and down arrows until the nozzle just grabs the paper. After you’ve set the offset, adjust the bed by clicking on the four corners and manually levelling each corner with the knobs.
The final step, once the bed has been manually levelled, is to click on the Auto.LVL tab and click on Start. The printer will go through the levelling process, checking several points on the bed. Once complete, the printer will home the bed and you are ready to print (once you have loaded your filament of choice). The included SD card has three test prints to choose from once ready.
You can also buy an optional acrylic enclosure that will be available around launch, and there are plans to integrate the Ender 5 S1 into the Creality Sonic Pad, giving users a Klipper firmware option that is easy to setup and calibrate with the Sonic pad.
Creality Ender 5 S1: Specs & features
Key specs
CPU: 32-bit Silent Mainboard
Levelling: Manual + CR Touch Auto-levelling
Build Volume: 220x220x280mm
Printer Dimensions: 425x460x570mm
Max printing Speed: ≤250 mm/s
Recommended printing speed: ≤120 mm/s
Nozzle Temperature: ≤300ºC
Hot Bed Temperature: ≤110ºC
Control panel: 4.3-inch color touch screen
Platform: Spring Steel Sheet
Supported filaments: PLA, PETG, ABS, TPU, PC, ASA, HIPS
Net weight: 12.1kg
The Ender 5 S1 might be the ideal printer for all of your needs given the simplicity of the on-screen menu system, which is packed with all the options you need to calibrate and configure the printer to your printing needs.
This is in addition to all the necessary features, including the auto-level system and the inclusion of the 300 Celsius maximum temperature of the included all-metal heat break.
Creality also plans to integrate the Ender 5 S1 into the Creality Sonic Pad, giving users a Klipper firmware option that is easy to set up and calibrate. There will also be an acrylic enclosure available for the Ender 5 S1, which will help with temperature-sensitive materials like ABS and add rigidity to the printer frame itself.
Creality Ender 5 S1: Print Quality & speed
Throughout our testing, we stuck to using the Creality slicer’s standard profile of 120mm/s. We also printed a few times with the 250mm/s profile and in both cases we couldn’t be happier with the results.
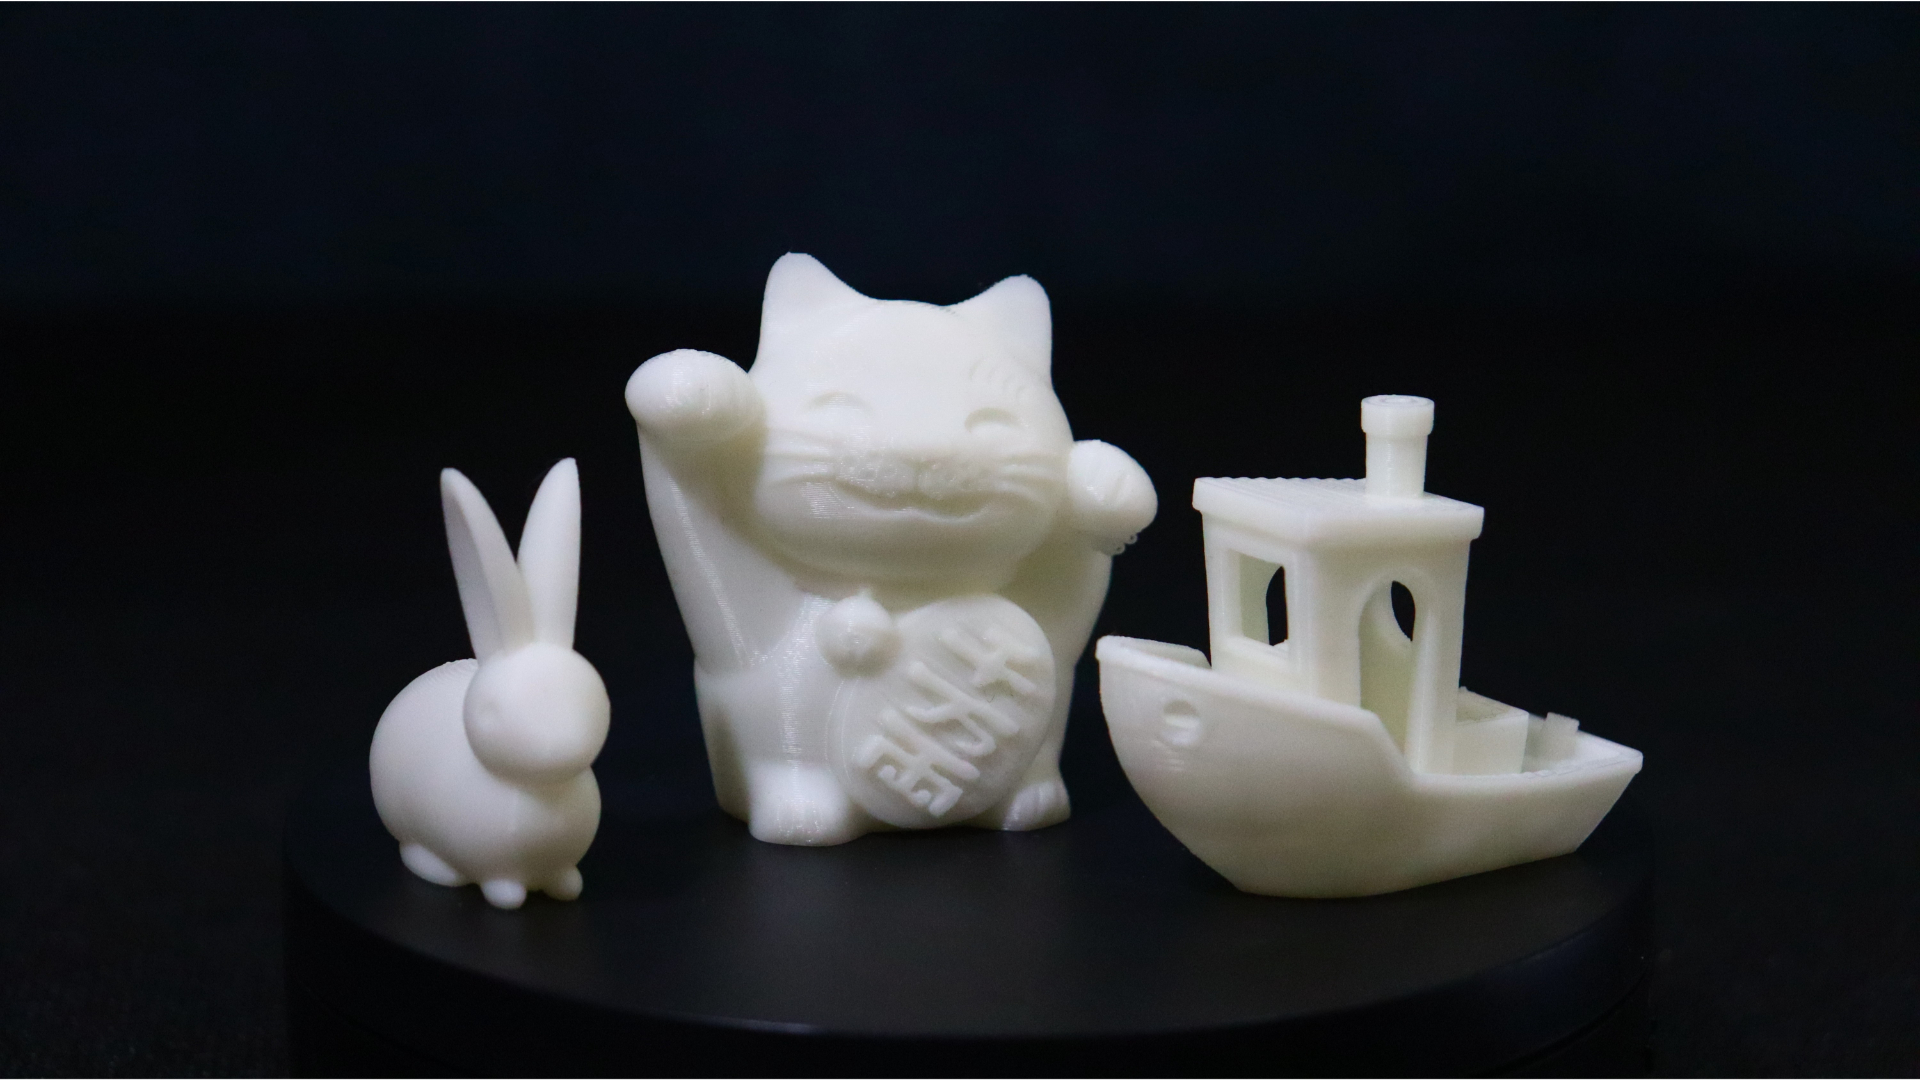
The first prints we have are the included test prints. A small rabbit, a lucky cat, and a benchy boat are among them. These models were sliced using the standard 120mm/s profile and turned out beautifully. Because of the dual part cooling duct, there were no overhang issues. There was also little to no stringing on the prints, which is one of the benefits of using a direct drive extruder.

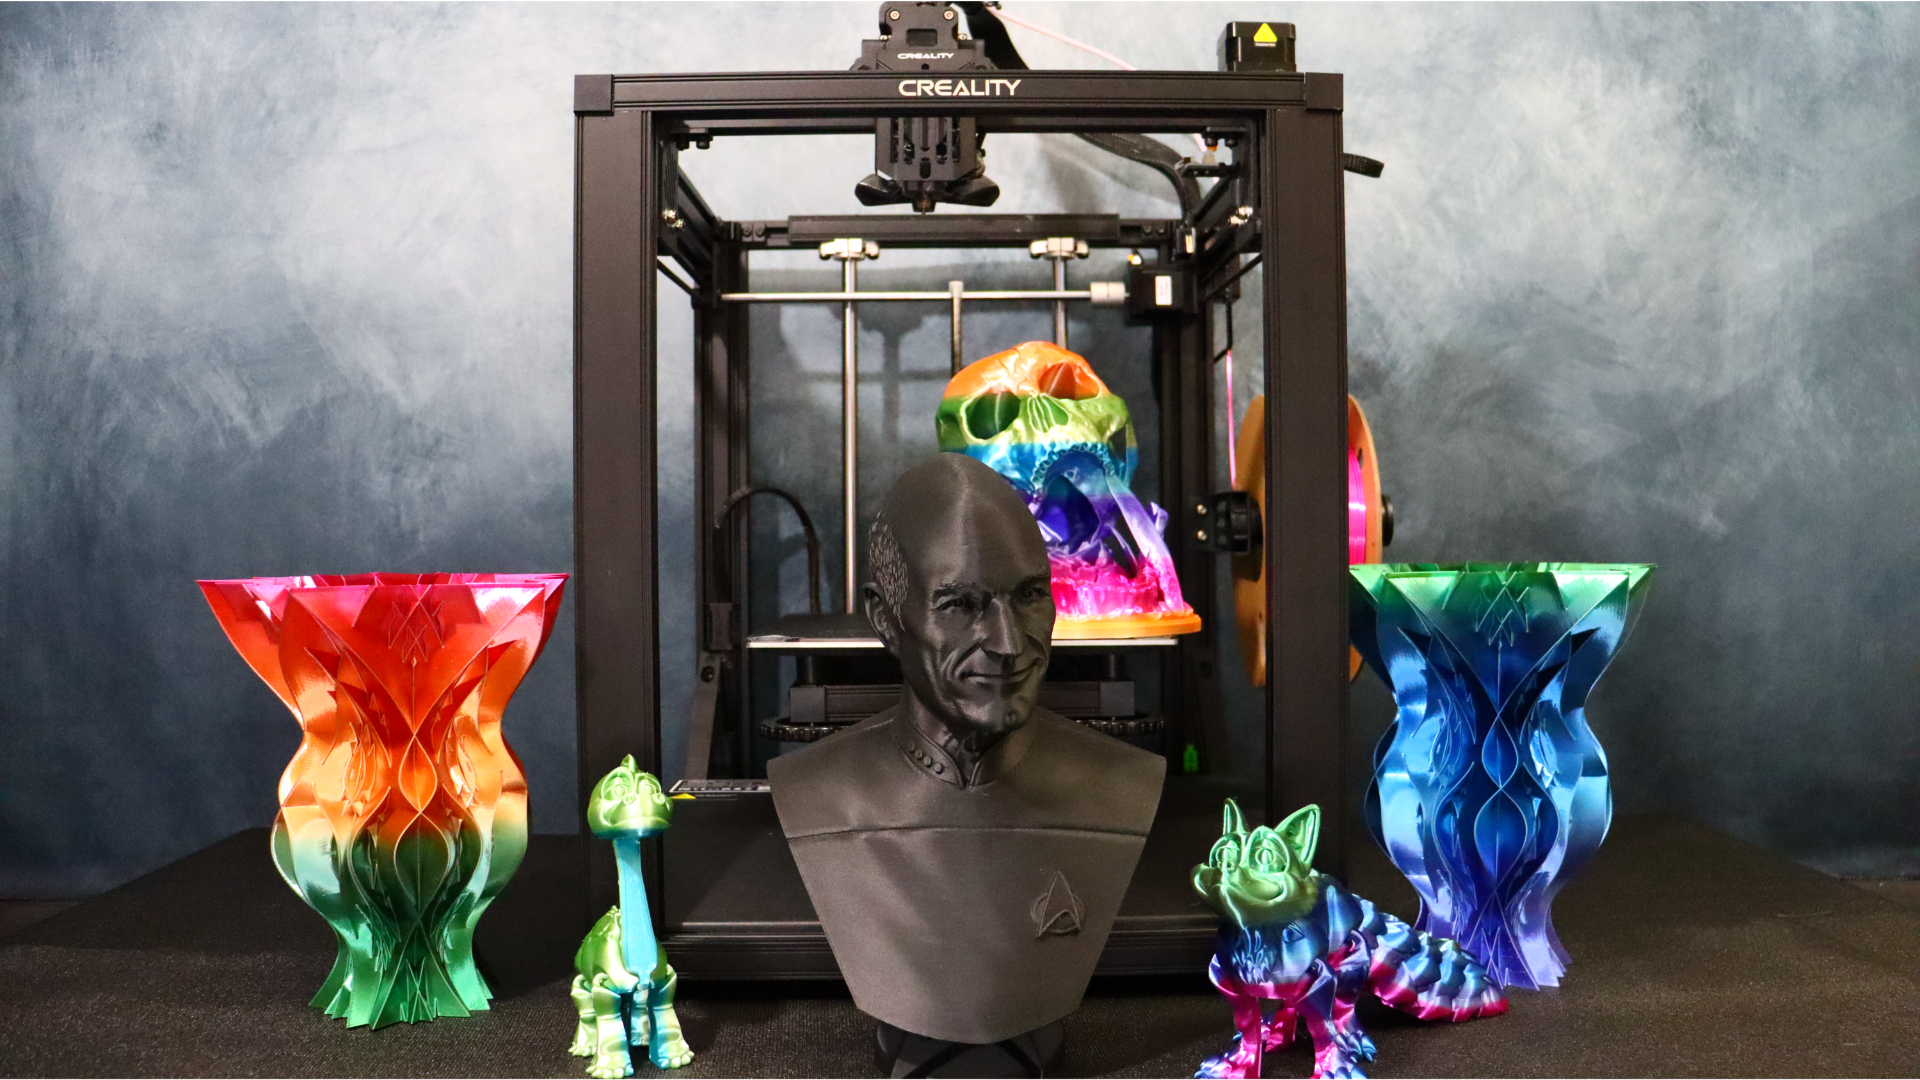
The next print we decided to test on the Ender 5 S1 is an Eastman Captain Picard bust. This model is from his Patreon (opens in new tab) page. This bust is a two-piece print that includes both the bust and the base it sits on. For this print, we used Anycubic black matte filament, which has quickly become one of our favorite PLAs. The print quality was fantastic at 0.16 layer height and the standard 120mm/s profile. The finished print’s level of detail impressed us. There were no print issues in the final print. Everything was spotless, and the final print looked fantastic.
We then decided to print a Flexi Fox from Flexifactory (opens in new tab). The fox came out great using Eryone Universe rainbow PLA and the same 0.16mm layer height and 120mm/s profile. As with previous prints, the model came out flawlessly. The joints were flexible and strong. And the color shift of the rainbow PLA worked really well with the fox model. Flexi prints are always a favorite to test with and this one came out great.
Following the success of the Flexi Fox Print, we decided to test one of FlexiFactory’s newer models, the Flexi Brontosaurus (opens in new tab). The dinosaur turned out just as well as the Flexi Fox in the previous print with no changes to the profile. The only difference this time is that the Eryone Universe rainbow filament has been replaced with the Eryone Candy rainbow filament.
We then decided to keep the Eryone candy rainbow and print the Desert Kiss dice skull from ArsMoriendi3D (opens in new tab). This is an impressive model that does not require any assistance or supports, making it an excellent choice for a test print. With this print, we chose to slice it at 250mm/s using Creality’s recommended speed settings and a 0.16 layer height. We were very pleased with the final print results, which took just over 22 hours to complete.
And for our final test print, we decided to try spiralized outer contour mode on a vase. Again, using the 120mm/s default profile, these vases took just over 3 hours to complete. We decided to do one in the universe rainbow and one in the candy rainbow PLA from Eryone for these prints. The rainbow PLA catches and reflects light in an amazing way.
Creality Ender 5 S1: Price & warranty
With a retail price of $559 (opens in new tab), the Ender 5 S1 is a fantastic 3D printer for builders seeking for an Ender-sized machine. It’s faster than conventional Cartesian printers while taking up a little less room. This is one of our finest 3D printers at the moment because to its CR Touch and all-metal hotend.
The Ender 5 S1 also comes with a one-year Limited Warranty, though be aware that it’s only a three-months Limited Part Warranty for consumable parts. That’s pretty standard for the industry.
Should you buy the Creality Ender 5 S1?

With the Ender-5 S1, Creality’s Ender series maintains its strong reputation for producing high-quality printers. It rarely disappoints and is a strong yet dependable printer that will win you over to Creality’s side. It produces fantastic prints using the out of the box settings, and we didn’t have any issues with stringing or other print defects across a wide range of test prints.
Whether you’re somewhat new to 3D printing or a seasoned pro, we can highly recommended Ender-5 S1 based on our time with it.
If this product isn’t for you?
If the Ender 5 S1 isn’t for you, we recommend looking into the other Ender series printers, such as the Ender 3 S1 line, which has three models available – the S1, S1 Pro, and S1 Plus. The S1 is the cheapest of these with prices starting at $379 (opens in new tab), which is quite a bit cheaper than the Ender 5 S1.
If you’re looking for a bargain on a 3D printer, whether it’s FDM like this or a resin model, check out our 3D printer deals page where we’re constantly adding great deals and savings as we find them.


