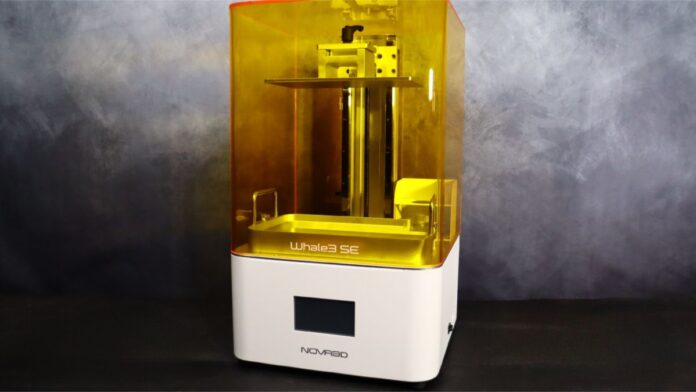
Nova3D is a well-established company in the 3D printing space, even if they’re not one of the big names that spring to mind when talking about 3D printers. Founded in 2016, they have a range of 3D printers on the market and recently they’ve added the Whale3 SE to their lineup, which is generating a lot of buzz. This 3D printer features a massive 10.3-inch 8K LCD, promising to deliver sharp and consistent prints.
That buzz is coming from the exciting features that it boasts, including a factory-leveled build platform, and resin auto-refill system, both of which can save you a lot of time and effort in the printing process.
Furthermore, the Whale3 SE comes with WiFi connectivity, which means that you can easily upload sliced files to the printer using your computer. It has built-in storage, a convenient feature that means you can store your print files directly on the printer.
With all these features, we were excited to put the Whale3 SE to the test and see how it performs against the best 3D printers on the market. If it lives up to its promises, it could be a major contender in the 8K resin printer market.
Nova3D Whale3 SE: Setup & design
- Easy to set up.
- Comes factory-leveled (though we’d still recommend you do it manually too).
- Looks stylish in white.
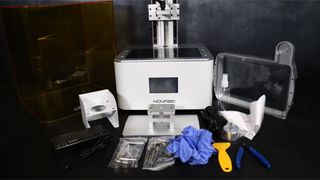
What’s in the box
Quick start guide
Whale3 SE printer
Printing platform
Power supply
Resin Vat
Resin Filter x 2
Gloves x 2 pair
Plastic spatula
Side cutters
Spray bottle
Replacement screws x 14 various
USB WiFi adapter
Allen wrench set
The Nova3D Whale3 SE requires very little setup before you can start printing. Simply remove the printer from the box, unpack the accessories, and remove the packaging foam. You will need to install the handles on the resin vat as well as the vat securing screws. Once complete, you only need to install the resin vat by removing the protective plastic from the vat and LCD screen. You will also need to plug the WiFi dongle into the USB port closest to the front of the printer.
The print platform comes pre-leveled from the factory, but in our experience, it is always best to level the bed yourself before starting a print. The Whale3 SE leveling process is a little different than most resin printers, as there are four adjustment screws and two locking screws that lock the platform once leveled.
To begin, you will need to loosen the two center locking screws, which will enable the bed to drop and move freely. Next, loosen the four leveling screws. Then, press calibration in the control menu and press OK. Place a piece of paper on the LCD, and once the platform has settled, go between the four leveling screws to adjust the tension of the bed on the paper. Use small movements on the screws while moving the paper. Once the paper is held in place, move to the next corner and repeat.
Once complete, press save, and the platform will rise to allow the installation of the resin vat. Overall, the setup process for the Whale3 SE is straightforward and easy to follow, even for those new to 3D printing.
The Nova3D Whale3 SE boasts a sleek design with an all-metal white base, which is a striking look compared to the typical black used by most printers. The yellow UV blocking acrylic cover is a more classic design choice, but it is much thicker and heavier than most covers. The USB and LAN ports are on the right side of the device, along with Wi-Fi antenna.
Nova3D Whale3 SE: Specs & features
- 10.3-inch 8K resolution LCD screen
- Auto resin refill
- Touch screen makes using the printer a breeze.
Key specs
Printing technology: MSLA
Build volume: 228 x 128 x 260 mm 8.97 x 5.03 x 10.23 inches
Light source: Nova3D 5th gen Crystal light source engine
Print resolution: 30um 0.03 mm
Layer height: 0.02 – 0.1 mm
Z resolution: 0.01 mm
Print speeds: 18 mm/h – 55 mm/h
Material: UV Resin 405nm
Connectivity: USB, WiFi
Touchscreen: 4.3-inch touchscreen
Dimensions: 341 x 312 x 580 mm / 13.42 x 12.28 x 22.83 inches
Weight: 16 kg
The Nova3D Whale3 SE has an impressive 10.3-inch 8K resolution LCD screen, with that hefty pixel density serving to offset the larger print bed to maintain high quality prints.
The light source powering everything is Nova3D’s 5th gen Crystal light source engine, which Nova3D states offers more uniform light intensity than the traditional Matrix light source that many printers use.
The printer also features a stand to hold a resin bottle upside down, ensuring consistent resin levels for each print. However, one potential drawback of the auto-fill feature is that the cap only fits on certain resin bottles, so it’s important to check compatibility before purchasing – if in doubt, all Nova3D resin bottles work and can be used to compare to other bottles.
Below is a video from the Nova3D website showing the refill system in action.
We found the menu system on the Whale3 SE to be intuitive and easy to use, thanks to the large 4.3-inch touchscreen. The touchscreen makes it easy to read file names and select options, streamlining the printing process and reducing the chances of user error.
Our only real complaint is that there are no options to adjust your settings once you start printing, so you need to make doubly sure you’ve got everything set up as you want it before you hit print.
Overall, the Whale3 SE offers a well-designed and user-friendly experience, making it a solid choice for both beginners and experienced users.
Nova3D Whale3 SE: Print quality & speed
During our testing, we used identical slicer settings for all test prints, and we did not encounter any bed adhesion problems. We used Anycubic Water Wash+ resin for all prints since the Nova3D resin was out of stock during our review period. The exposure times were set to 2.4 seconds for the layers, with 25 seconds for the initial burn-in layers and 1 second of off time.
For most of our testing, we used Chutubox slicer, and we used the Nova3D Novamaker slicer for our first print. We uploaded all prints via WiFi to the built-in storage for printing, other than our final print, in which we used a USB drive.
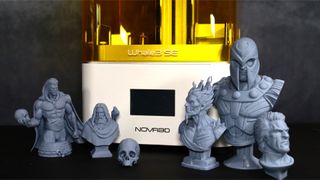
For our first print, we chose the Odin bust model from Fotis Mint. This model was a great choice for testing, as it features a lot of intricate details in the cloak Odin wears, including the raven on his shoulder with highly detailed feathers. The print took just over 4 and a half hours to complete the bust and base.
The Whale3 SE impressed us with the level of detail it was able to produce, capturing every nuance of the intricate design of the model. The Anycubic Water Wash+ resin proved to be an excellent choice for this print, as it produced highly detailed results and was also easy to clean up.
The final result of the Odin bust was a stunning piece that showcased the full capabilities of the Whale3 SE. The level of detail captured in the model’s intricate features was remarkable, and it was clear that the printer was able to bring out every aspect of the design.
After our successful first print, we wanted to push the Nova3D Whale3 SE further and test it with an even more challenging model. That’s when we decided to try printing Fotis Mint’s Hades bust, one of their latest designs. We opted to print it at 80% scale to fit both the bust and its base on the bed simultaneously.
As expected, the outcome was outstanding, with sharp details and excellent texture, thanks to the Whale3 SE’s high-resolution 8K LCD and COB light source. We used the maximum of 5 x AA for all prints to ensure the edges came out clean and pristine, without any artifacts.
Despite taking 6 and a half hours to print, the level of detail and quality of the final product exceeded our expectations. The Whale3 SE accurately captured every intricate detail of the model, from the precise folds and creases of Hades’ robe to the texture of his skin and scars. We were thrilled with the outcome and impressed by how well the printer handled the complex geometry of the model.
For our next print, we chose The Sentry bust from 3DWicked, known for their extensive collection of highly detailed models. This model came in several pieces and required two separate prints to complete. Each print took just over 4 and a half hours to complete. Once assembled, we were again thrilled with the results. Thanks to the 8K screen and COB light source, the fine details of the The Sentry’s suit were captured beautifully, and even the skull held in his hands was full of detail, from the cracks to the growth lines on the skull itself.
We found that the Whale3 SE’s maximum 5 x anti-aliasing (AA) setting produced consistently high-quality prints with sharp edges and no visible artifacts. The Sentinel parts fit together perfectly, and we didn’t encounter any issues with adhesion or print failures. Overall, we were impressed with the Whale3 SE’s performance on this complex and detailed print.
We also decided to print the skull held by Sentinel at its full 100% size to test if there was any loss in detail or quality. The results were just as impressive as the smaller one previously printed, with no noticeable loss in detail. The Whale3 SE managed to capture the intricacies of the skull’s structure, from the cracks to the texture of the bone itself.
We were impressed by how the printer handled the challenging geometry of the skull, with its curved and jagged surfaces. The print took approximately two and a half hours to complete.
Overall, we were thrilled with the quality of the print and satisfied that the Whale3 SE can produce consistently detailed and high-quality prints, even at full size.
For our final print test with the Whale3 SE, we chose to print the Magneto bust from popular model creator Eastman. This model offers several head options, and we decided to print two of the provided versions to test the printer’s capabilities. Despite the model’s complexity, the Whale3 SE handled it with ease, and the resulting prints were outstanding.
The sharp 8K LCD and COB light source, along with the maximum of 5 x AA, ensured that the details of Magneto’s armor and collar were clear and precise, down to the texture of the metal and the fabric. The head without the helmet also showcased the printer’s ability to produce intricate details.
The print took just over 6 hours to complete, but the final product was well worth the time and effort. We were impressed with how the Whale3 SE brought out the full potential of Eastman’s Magneto bust, making it a great choice for advanced users looking to create high-quality prints.
Nova3D Whale3 SE: Price & warranty
- Typically $599.99.
- 12-month warranty.
The Nova3D Whale3 SE has a recommended retail price of $899 USD according to the Nova3D website, though in reality we’ve never seen it on sale for more than $600. Indeed, the regular price on Amazon is $599, and that is supplied by Nova3D themselves. It is a high-quality printer that offers excellent value for that price point, making it an attractive option for both professional and hobbyist users.
The Whale3 Se has a limited 12-month warranty that covers the various parts within the Whale3 SE with full information available on the Nova3D website.
Should you buy the Nova3D Whale3 SE?
Overall, our experience with the Nova3D Whale3 SE 3D printer has been overwhelmingly positive. We found it to be a highly reliable and capable machine that consistently produced high-quality prints with excellent detail and resolution. The combination of an 8K LCD and COB light source was especially impressive, as it effectively brought out the intricate details of each model we printed.
It’s a versatile machine, capable of printing models at various sizes and levels of complexity without any issues. With a hefty print volume of 228 x 128 x 260 mm, the Nova3D Whale3 SE can handle quite large prints too. We really appreciated the quality of life features like the resin auto-refill and WiFi file transfer, which add a level of convenience that many other printers don’t offer.
We’re tripping over great 3D printers these days, but whether you’re a first-time user or looking to expand your current lineup of printers in your workshop, the Nova3D Whale3 SE is a great option to consider.


