Anycubic takes another shot at perfecting the budget 3d printer with its latest effort, the Anycubic Kobra Go.
Currently celebrating its seventh anniversary, Anycubic recently released the Anycubic Kobra Go , which was aimed at the low-cost market but came with some assembly required. The Anycubic Kobra Neo, the next member of the Kobra family, now joins the expanding Kobra family. With a price of $249 USD, the Anycubic Kobra Neo is also aimed at the budget 3D-printing market, but what does it do to differentiate itself from the Go?
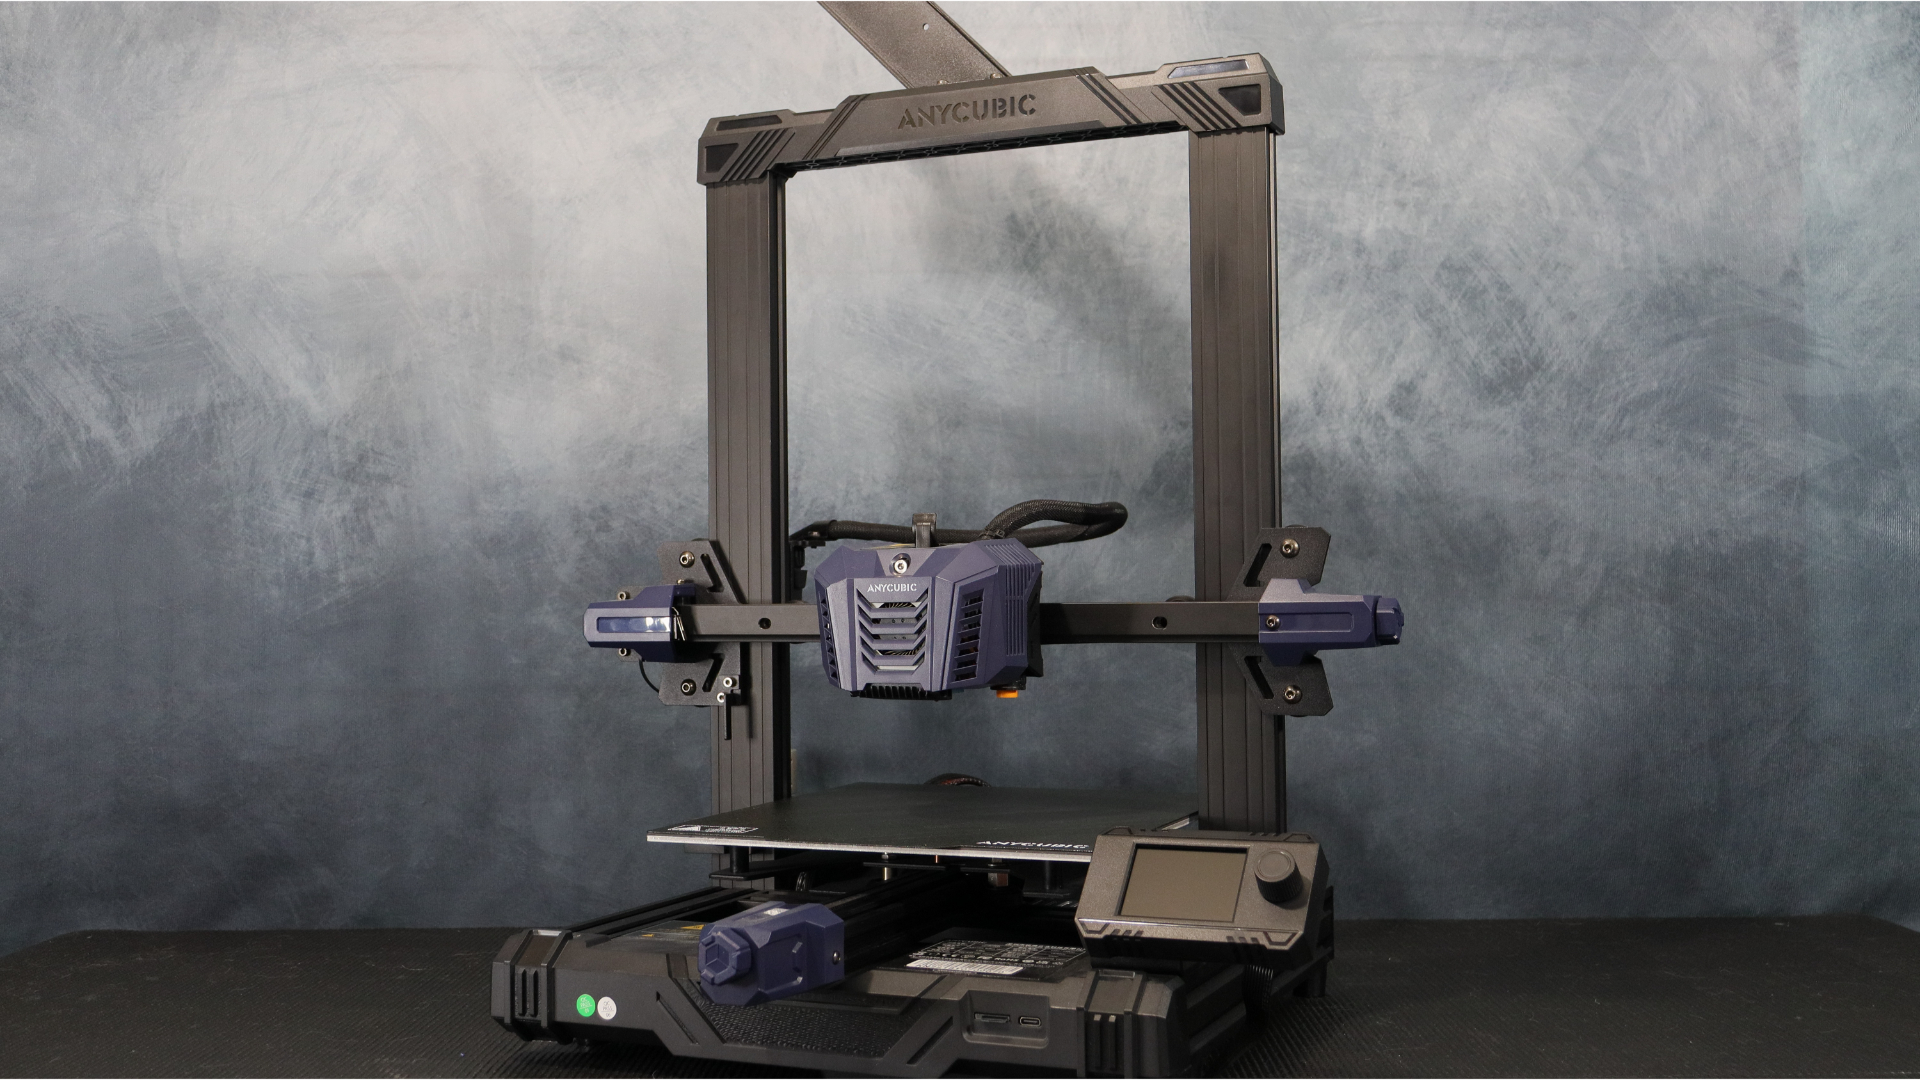
Unlike its predecessor, the Kobra Go, the Neo is 95% assembled this time. With a setup time of about ten minutes and a direct drive extruder/hotend combo, it’s a great little FDM printer for beginners and experienced printers alike. The Kobra Neo is contending for a spot in our best 3D printer rankings.
We’ve put the new Kobra Neo through its paces with some simple and complex prints as you’ll see below, and we’re impressed with the results.
Anycubic Kobra Neo: Design and setup
The new Anycubic Kobra Neo, which follows the same design as the Kobra and the Kobra Go, was released as part of Anycubic’s seventh anniversary celebration. The Neo, like the Kobra Go, has a non-touch display with dial control, which worked flawlessly in all of our tests and was simple to control and navigate.
Anycubic has replaced the Bowden setup of the Kobra Go with a direct drive setup, and the part cooling blower has been mounted on the front of the hot end rather than the back of the assembly as it is with the original Kobra.
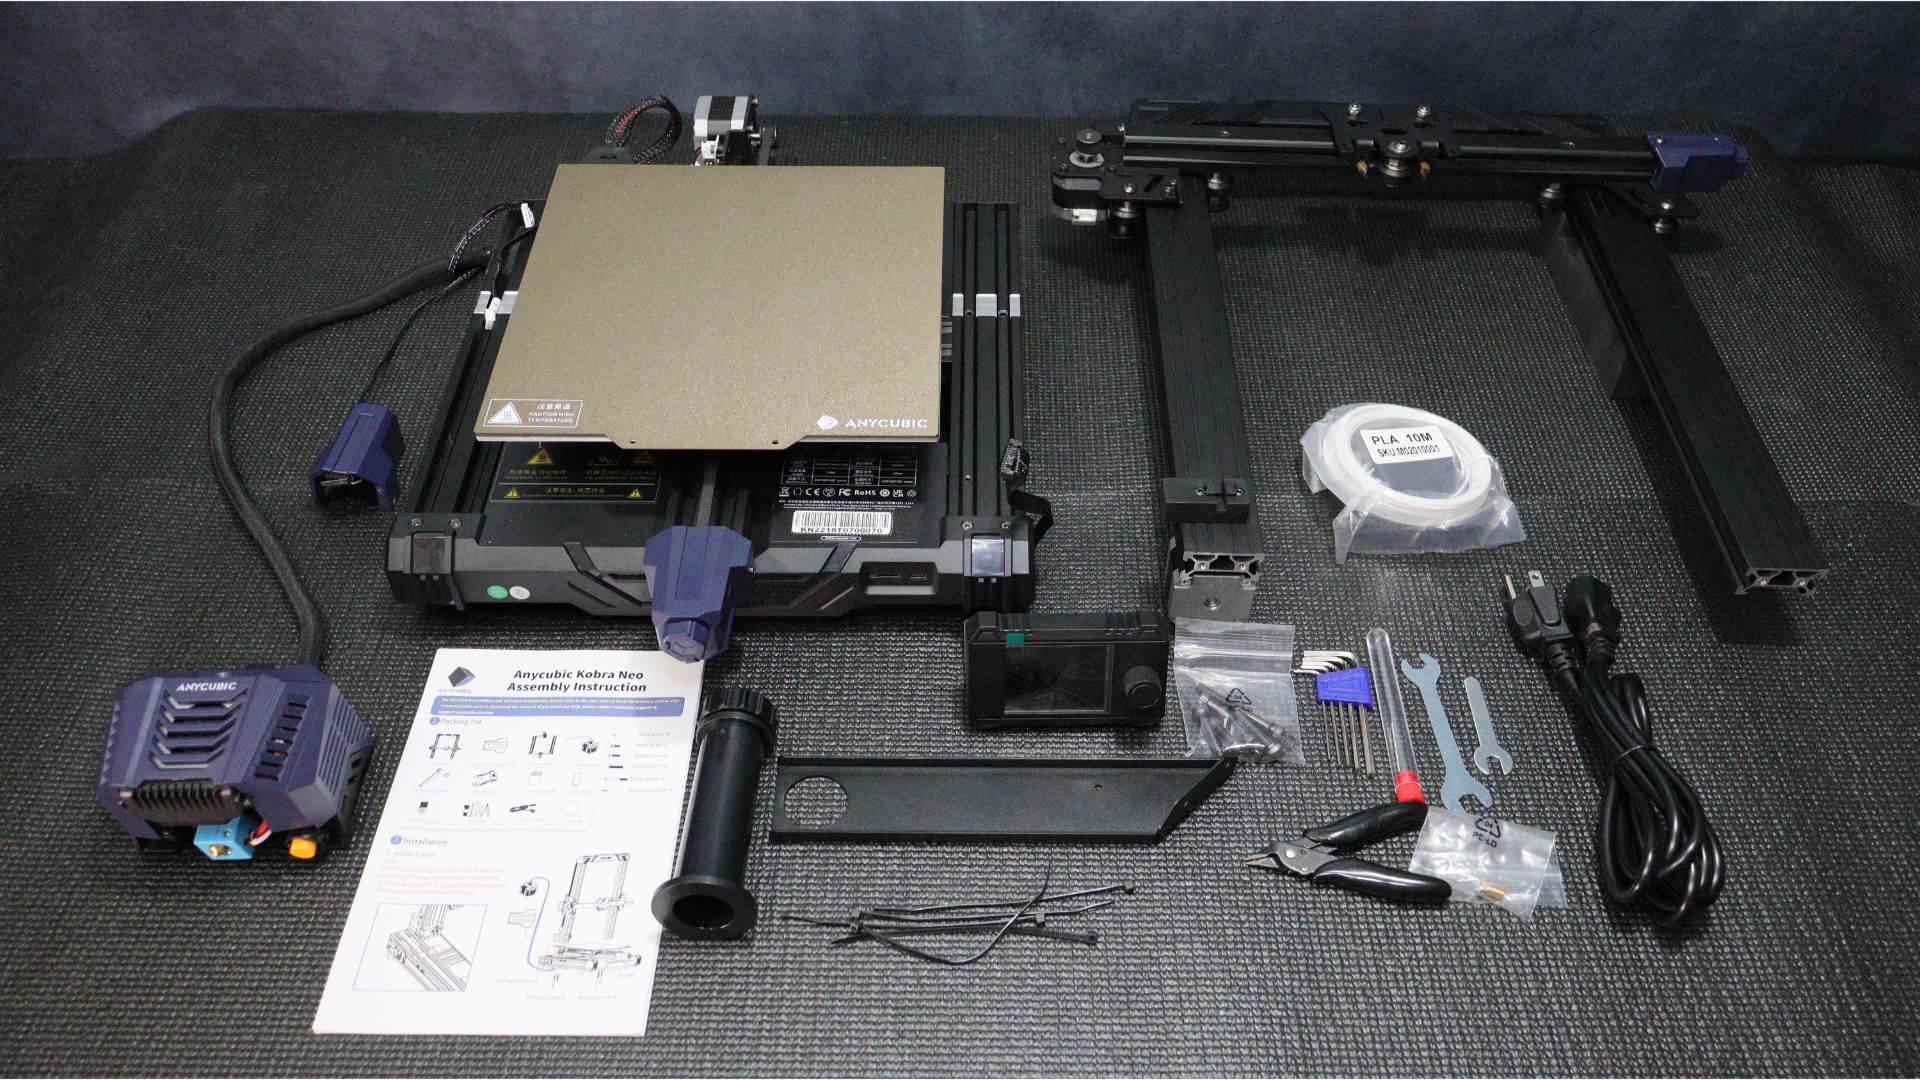
What’s in the box
Printer base
Upper frame
Print head
Display screen
Filament holder
Assembly screws
Spring washers
Tool Kit
X axis limit switch
Power cord
Micro SD card
USB reader
User manual
Sample filament
Extra nozzle
The Kobra Neo’s setup is much simpler than that of the Kobra Go. The Neo arrives 95% assembled. The only steps are to mount the frame to the printer base, connect the X-axis limit switch to the X gantry, and then mount the printhead to the X gantry backing plate.
Next, we mount the display screen and spool holder to the printer’s top. These are the steps involved in the assembly procedure. The only steps left are to connect all of the cables to the various motors and limit switches, and then to the display screen.
Once the setup is complete, secure the cable to the printhead bowden as well as the extruder mounting plate, leaving enough slack in the wires to enable the print head to move freely across the X-axis without binding.

Our final step in the setup process is to inspect all of the belts and wheels to ensure that they are all snug and that there is no wobble or play in any of the wheels on the hot end, bed, or upright profiles on the Z-axis.
We found the assembly process was very quick, taking about ten minutes for the assembly itself and about 15 minutes for tightening all the wheels and belts.
The Neo, like previous Kobra models, comes standard with auto-leveling, which you can access via the display in the main menu under leveling. As with the Kobra Go, once the level is set, you adjust the Z-offset as you begin the first print.
Anycubic Kobra Neo: Specs and features
- 32-bit CPU
- Near silent printing

Key specifications
Leveling: Anycubic LeviQ 25-point automatic leveling
Printing platform: 220 mm x 220 mm x 250mm
Filament run-out detection: Optional
Printing material: PLA / ABS / PETG & TPU
Nozzle size: ø 0.4 mm (replaceable)
Printing speed: Typical 60 mm/s max 100 mm/s
Control panel: 2.4″ LCD screen with a control knob
Z-axis: Single threaded rod
Despite being a low-cost printer, Anycubic does not skimp on features. A 32-bit CPU powers the Kobra Neo. Other Kobra printers use the same CPU and, as an added bonus, it has silent stepper drivers too.
In terms of noise, the Kobra Neo is a nearly silent printer, with the majority of the audible noise coming from the cooling fans on the hot end and mainboard. During our testing, the Kobra Neo averaged around 48 dB, which is perfectly acceptable for working in the same area without being distracted by noise.
Anycubic Kobra Neo: Print quality and speed
- Great print quality for the cost.
- No cleanup required on our test prints.
This time, instead of doing the standard test print with the Kobra Neo, we decided to jump right in with a beautiful vase design. The Klein Vase (opens in new tab) was discovered on MyMiniFactory, a great resource for finding 3D print files.
We used 0.2mm layer height with 15% infill at 70 mm/s. We chose not to use vase mode with this print because the design does not work well with it. We were blown away by the quality of the print when it was finished using Anycubic matte black PLA. Even with the excessive number of retractions required for this style of print, the intricate design printed flawlessly with no stringing.
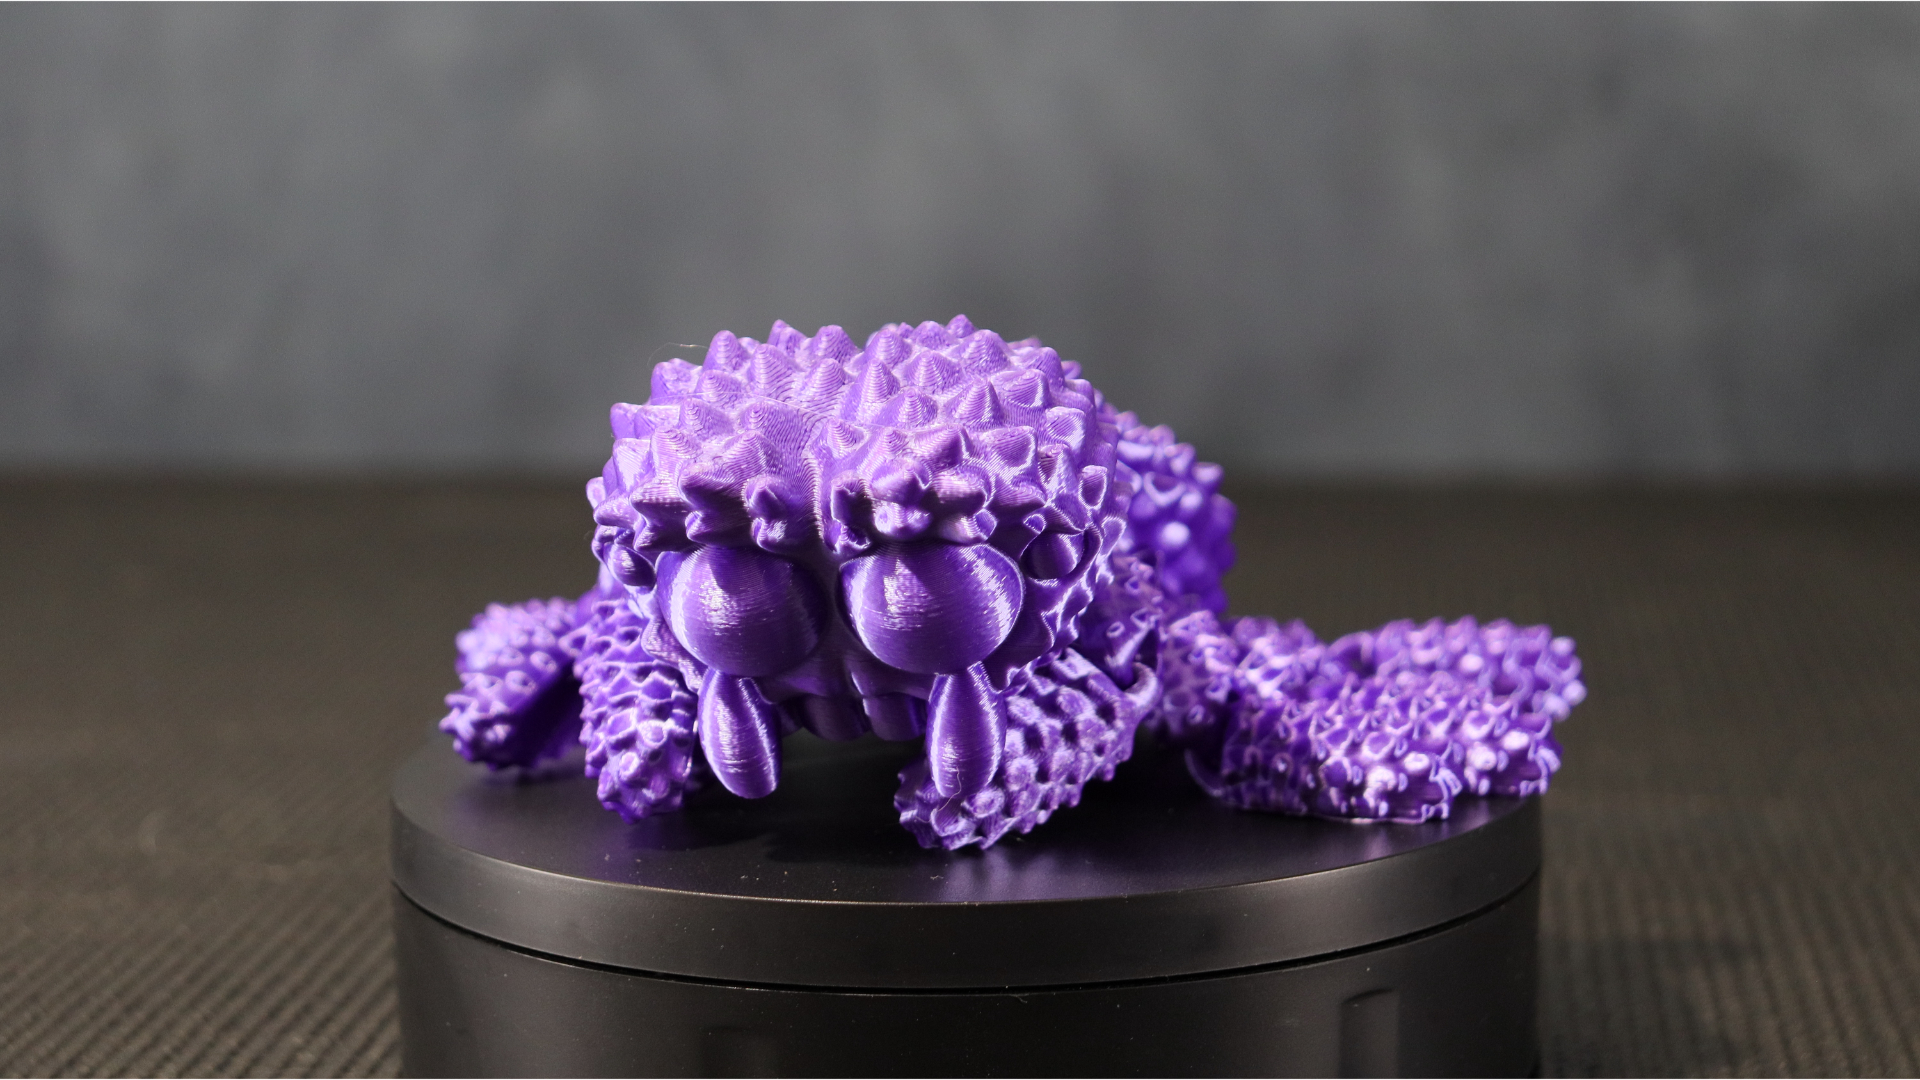
The second model we decided to print was an articulated cute spider found on cults3d (opens in new tab). Articulated prints have long been a favorite of both new and experienced creators.
With its many spikes, this model seemed like a good test for the Kobra Neo, and we couldn’t be happier with the results using Polymaker silk purple PLA. Right out of the box, this is one of the best prints we’ve seen on a printer. We used 0.16 mm layers with the same 15% infill and 70 mm/s speeds for this print.

Keeping with the flexible model theme, we chose to print a flexible squirrel. This model is from Flexi Factory. Using Polymaker watermelon matte PLA with the same slicer as previous tests, the model came out great. None of the joints had any movement issues. Again, as with the previous tests, there was no stringing using a retraction distance of 3 mm.
For the final test of the new Kobra Neo, we decided to go a little bigger. The model we chose is Hex3D’s Sith acolyte mask. This time, we increased the layer height to 0.2 mm while leaving all other settings unchanged from previous tests. The mask took just over 25 hours to print, and the final print quality was outstanding. Every detail of the mask stands out thanks to the use of Eryone Ultra Silk Dark Gold PLA. A
All of the embossments on the mask are sharp and cleanly printed. The gleam of the Silk PLA makes this print really pop. The finished mask appears to be metallic in appearance. Reducing the layer height to 0.12 or even 0.10 would significantly improve the surface finish of the final print. This is one of the most impressive prints we’ve seen in recent reviews, regardless of layer height.
Anycubic Kobra Neo: Price and warranty
- MSRP: $249.99
- One year warranty
The Kobra Neo will have a regular price of $249. The Kobra Neo is available to order now directly from Anycubic (opens in new tab) as well as from Amazon (opens in new tab) and other online retailers. As with all the printers Anycubic sell, the Kobra Neo comes with a one-year warranty.
The $250 price point means the Kobra Neo is slightly more expensive than it’s sister machine, the Kobra Go, but you’re paying largely for the convenience of not having to the build the thing yourself, which can be intimidating to a first timer. We think both are great choices, it just depends on whether you want to get straight to printing, or you’re looking for a mini engineering project to enjoy too.
Should you buy the Anycubic Kobra Neo
With the release of the Kobra and Photon M3 series, Anycubic has had a very busy year. As part of the anniversary celebrations, the Photon D2 was released alongside the announcement of the Kobra GO, which we reviewed earlier this month.
Anycubic shows no signs of fatigue with the Kobra Neo, the fifth member of the Kobra family. Every component of the printer works properly, and the print quality right out of the box with minimal calibration was a pleasant surprise.
Some may miss the touch screen, but the Kobra Neo’s display includes everything you need to set your temperature, load and start prints, and adjust settings while printing.
We had a great time testing the Kobra Neo, and it appears to be a contender for one of the top budget 3D printers on the market.


